1. Preparing the Installation Site
- Verify the door opening matches the pre-cut WPC door dimensions.
- Clear debris and ensure the floor/flooring is level.
- Check wall integrity; repair any uneven surfaces.
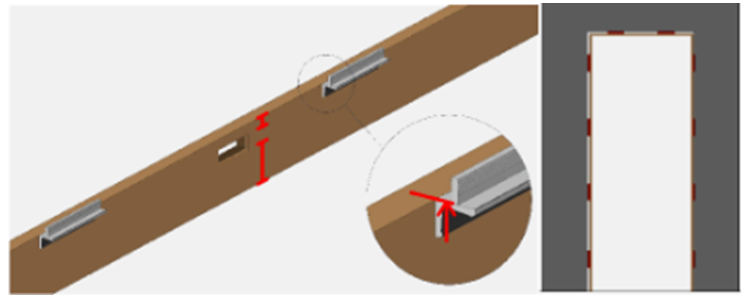
2. Installing Decorative Board Connectors
- Horizontal boards: Fix 2 connectors per piece.
- Vertical boards:
- Up to 2400mm: 4 connectors per piece.
- Above 2400mm: 5 connectors per piece.
- Critical note: For the latch-side jamb, ensure the smaller edge-to-hole distance faces outward.
3. Assembling the Main Door Jamb
- Align the main jamb (latch side) and auxiliary jamb (hinge side).
- Temporarily secure with a nail gun, then reinforce with 4×40mm self-tapping screws.
- Use a level to ensure perfect vertical alignment, especially around the latch hole.
4. Installing the Door Jamb into the Opening
- Place the assembled frame into the opening.
- Leveling:
- Top/bottom boards: Ensure horizontal with a spirit level.
- Side boards: Check vertical and parallel.
- Reinforcement:
- Insert wooden shims (4 per side, 2 at top) for stability.
- Apply expanding foam sealant between the jamb and wall.
- Cure time: ~20 minutes.
- Nailing:
- Use a nail gun only in hidden areas (e.g., jamb junctions, hinge zones).
- Avoid visible spots or screw holes.
5. Installing the Door Stop & Silencer
- Attach the door stop at jamb junctions using glue + nails.
- Leave a 3–5mm gap for the door leaf.
- Secure the silencer strip in its groove.
- Pro tip: Use temporary wooden braces to prevent frame warping during foam expansion.
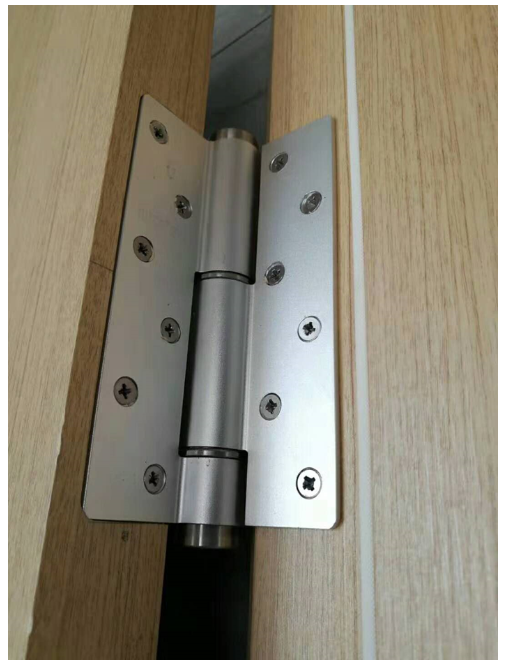
6. Hanging the Door Leaf
- Hinge Installation:
- Attach mother-son hinges to the door leaf (aligned with opening direction).
- Spacing:
- 1st hinge: 150mm from the top edge.
- 2nd hinge: 384mm below the first.
- Gap Adjustment:
- Top: 3mm
- Sides: 3mm
- Bottom: 7mm (for ventilation/clearance).
- Hang the door and test swing smoothness.
7. Installing Hardware
- Handles/Locks: Ensure precise alignment; tighten screws firmly.
- Concealed Floor Suction: Align with the door’s closed position.
- Final Test: Verify smooth operation of all components.
8. Cleanup & Inspection
- Remove shims, trim excess foam, and wipe down the door.
- Confirm no scratches or misalignments.